Damage Control Circuit Design
Background: I wanted to go into more detail on Damage Control (aka Spaceship Frenzy), my round 3 BVW world. My team wanted to make cooperative alien spaceship bridge game using a large Makey Makey interface. The players would see two symbols displayed on the screen along with their spaceship and needed to connect those symbols together using their hands to progress through an asteroid field. Eventually we wanted players to have to touch hands to connect distant buttons. Due to our platform being restricted to Makey Makey I needed to get creative to mitigate the platform's electrical limitations. I'll also talk about some of the design work I did on the game.
Electrical Limitations: The Makey Makey platform is designed to turn anything into a button. Connect banana clips from the space bar, mouse click, or arrow key leads to everyday (conductive) objects, hold the banana clip connected to the negative lead, and presto! When you touch the object, it completes the circuit and functions as a key press.
However, If we want the players to complete circuits by touching hands, then some buttons must be positive, and others negative. This means that for any set of buttons, half of the two button combinations (positive and positive, negative and negative) will not create any signal, and consequently provide no feedback. Furthermore, since the Makey Makey only has one negative terminal, a positive button combined with any of the negative buttons (regardless of matching symbol) would yield a button press.
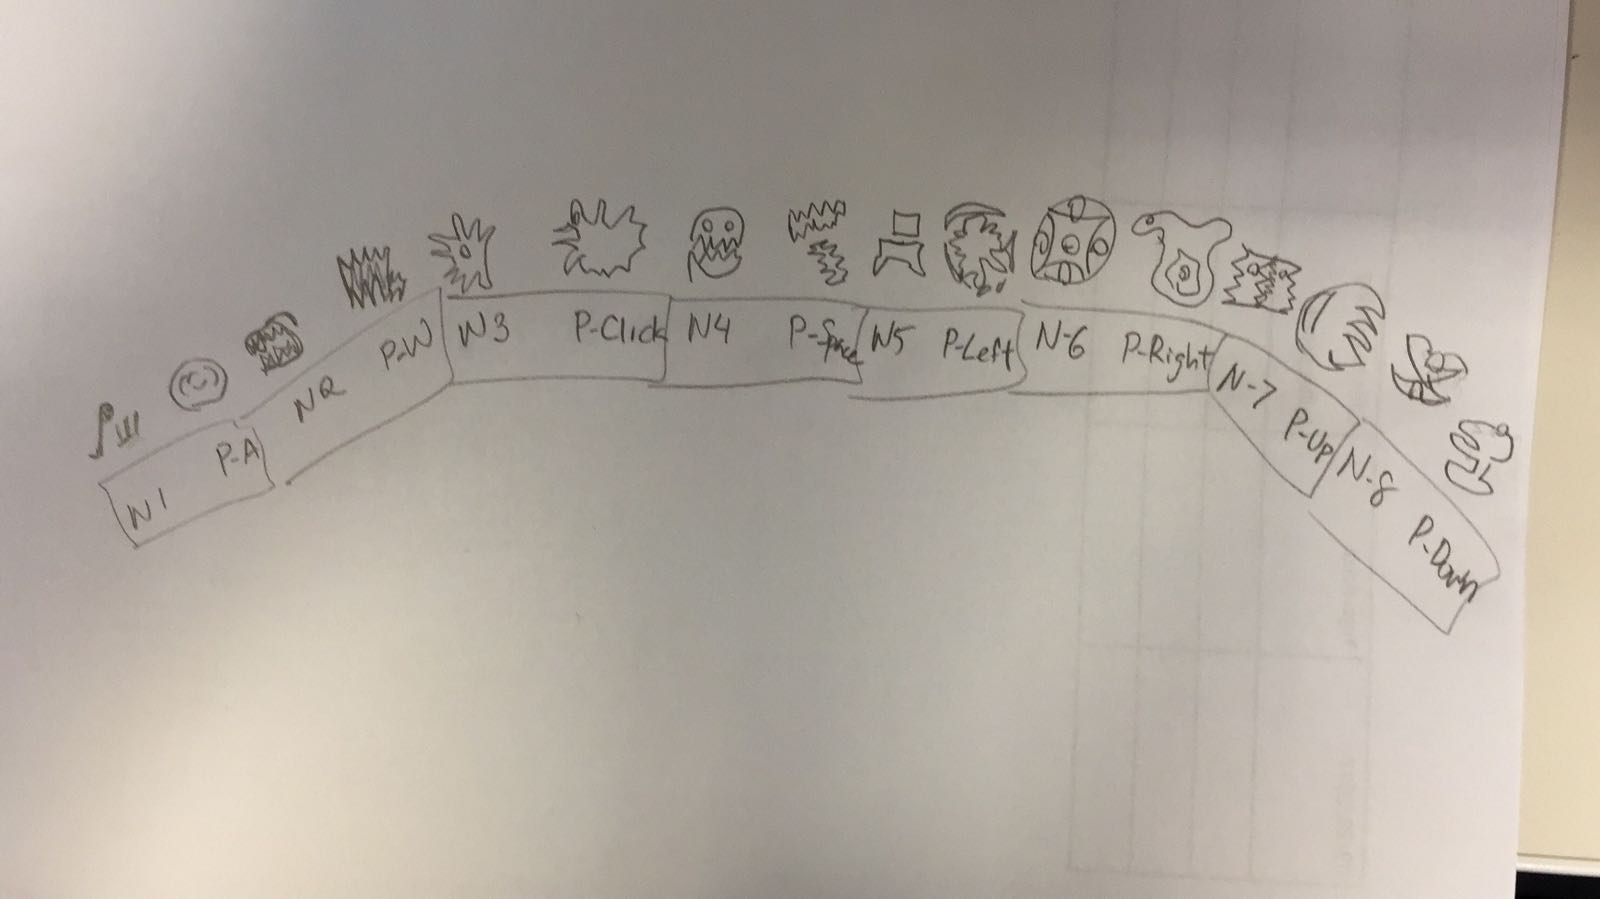
I decided on the configuration below, alternating positive button inputs (P-A for A button, and so on for space, click, and the arrow keys) and the negative lead (all 8 connect to the same negative terminal). I also pushed for constant negative feed back in the way of sound and lights so the players would know they haven't hit the correct buttons yet. Since we can only provide feedback on a positive button combination the only different feedback we give is the symbols going green when correctly matched and a bling sound.
This configuration meant that for players to get a false positive, they would need to have one hand on the correct positive terminal, and their other hand on any negative terminal. Since each displayed negative symbol's button will be surrounded with positive terminals, it is unlikely that the guest would accidentally touch the wrong negative button. In practice the game flowed quite well and we didn't observe any false positives from wrong negative terminals.
That doesn't mean we didn't see false positives though...
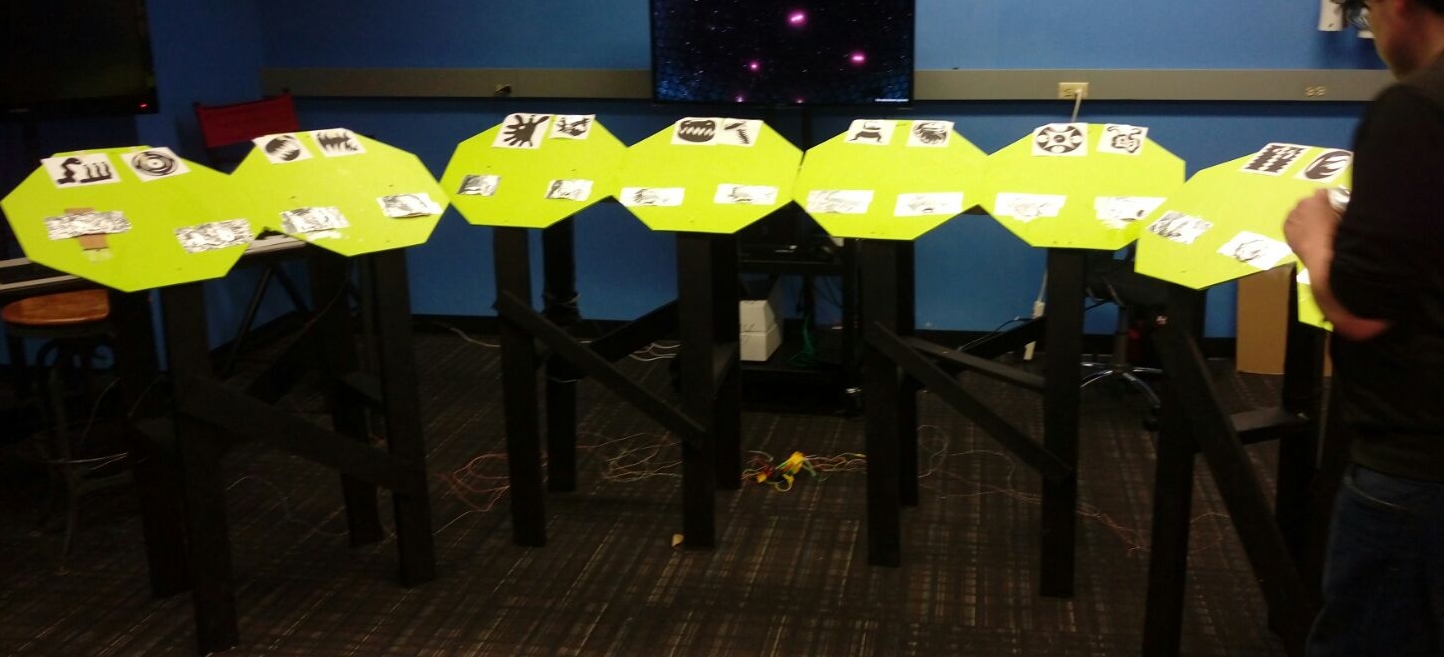
Conductive Enough for Makey Makey: For our buttons we used a conductive clay, painted with a silver foil. I drilled holes in the front of the interface and brought the wire leads for the Makey Makey through, suck them into the buttons, then attached the buttons over the holes. I quickly realized that the silver foil would not hold up well due to the malleability of the clay, so I covered each button in metal conductive tape. We then attached the symbols above each button. You can see the result below.
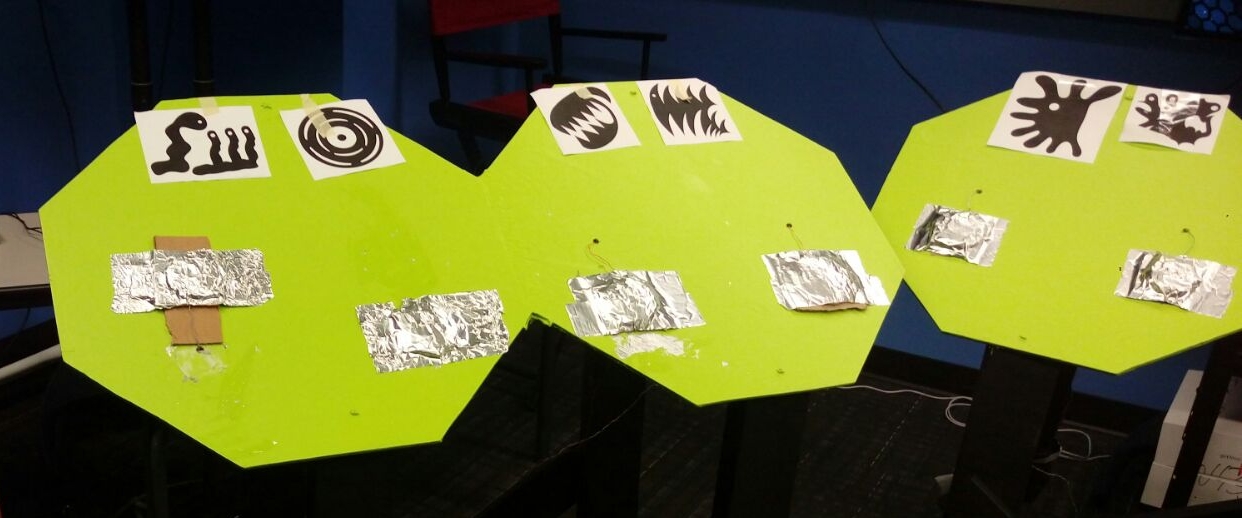
This worked out great in the beginning, but we started seeing mysterious false positives, sometimes with no buttons being pressed, and other times with just a single button press. After isolating which buttons were causing the issue I discovered that the glue used for the metallic foil was spilled onto the surface near a button and was conductive enough to cause button presses when touched. I also discovered that some of the conductive clay had oozed through the hole drilled for the wire and made contact with the wood glue. This connection between two buttons (wire to clay to wood glue to clay to wire) was just conductive enough to cause electrical shorts with Makey Makey. To solve this I removed the buttons then reattached them, but this time isolated from the holes by placing a piece of cardboard underneath. You can see this on this up close below.
For a look at a test run of our game click here!
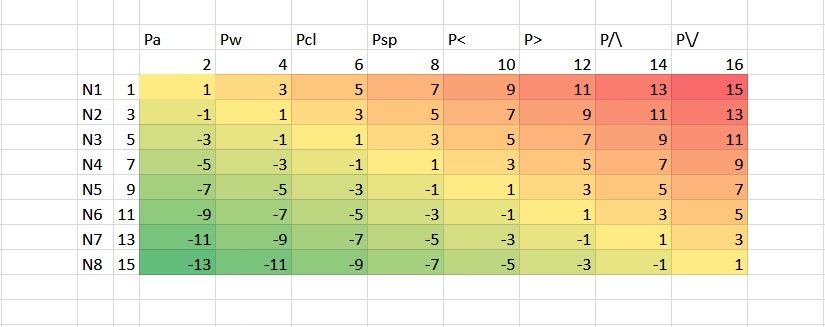
Difficulty Mapping: To make it easier to tune our gameplay, I mapped out the relative difficulty for each two button combination. For difficulty I assumed that the further apart two buttons were, the more difficult it would be to make the combination. All that is important is the magnitude, not the direction, so negative numbers and positive are the same for this matrix (see below). Using this I was able to input each of the 64 button combinations into Unity and sort them into categories by difficulty. For our gameplay script we could call a random combination from each difficulty category, that way the game was different each time while still keeping the same difficulty level overall.